
Resolve
A collaborative online community that brings together photographers and creative professionals of every kind to find ways to keep photography relevant, respected, and profitable.
Have an idea for a post?
Want us to find an answer to your question? Interested in becoming a contributor?Email us
CATEGORIES
- Aerial Photography
- Business
- Featured Blogger
- Featured Website
- Fine Art Photography
- Ideas
- Industry Events
- Inspirational Work
- Meet the Team
- Networking
- New Features to LB8
- On The Calendar
- Philanthropy
- Photography
- Adventure Photography
- Advertising Photography
- Animal Photography
- Art Photography
- Beauty Photography
- Celebrity Photography
- Commercial Photography
- Documentary Photography
- Editorial Photography
- Fashion Photography
- Food Photography
- Hospitality Photography
- Interior and Architecture Photography
- Landscape Photography
- Lifestyle Photography
- Nature Photography
- Photojournalism
- Portrait Photography
- Science Photography
- Space Photography
- Sports Photography
- Still Life Photography
- Travel Photography
- Wedding Photography
- Wildlife Photography
- Wine Photography
- Playlist
- Playlists
- Social Media
- Tuesday's Tip
- Video
- Webinar
- Website Tips
Tuesday’s Tip

At liveBooks, we know that adding video blocks to your page is an important part of your website. We also know that adding text around those videos can help guide your audience and give them information about the content of your work. Whether its a short description of what the video contains or a simple line stating where the video took place, liveBooks8 offers you the ability to customize every part of your video gallery. Follow the tutorial below to start styling and designing the content around the video now!
- To place text content around your video, use the Title and Description fields in the block’s settings in the Content tool. Insert your content into the fields.

2. From here, you are ready to design/style the look of the video on your page. Select Design this page on the top right-hand corner.

3. You will see your blocks on the right-hand side. Select the Video block.

4. You will immediately see layout options to position your text around the video. You can position the content how you would like (top/center/bottom) and also wrap the text around the video. Select the option you prefer.

5. Select Save and Publish!
If you are currently have a storefront with WeddingWire and have received three (3) or more client reviews, you are eligible to place the WeddingWire Rated logo on your website! Learn how you can begin with our simple tutorial below:
- Log in to your WeddingWire account
- Click ‘Showcase Reviews‘ under the ‘Reviews‘ tab
- If you are eligible, you will see the WeddingWire Rated badge under the ‘WeddingWire Rated‘ heading
- Click the ‘Get the Code‘ button
- Copy the HTML code
- Open your liveBooks dashboard
- Click Content
- Click on the page you wish to add your ‘WeddingWire Rated’ logo
- Click the green ‘+‘ icon to add a content block to the desired page

10. Highlight and click the ‘HTML‘ content block

11. Paste the HTML code you copied from your WeddingWire account into the HTML box.
*For more information on how to use this content block, click here.

12. Save and publish!

liveBooks understands that leading clients to your WeddingWire storefront so they can review you is an important part of your business! This is why we created a simple way to add a ‘Review Us’ button to your website. To begin, follow the steps below:
- Log into your WeddingWire account
- Click ‘Request Reviews’ under the ‘Reviews’ tab
- Under the ‘Review Us Button‘ heading, customize your button color
- Click ‘Get the Code‘

5. Copy the HTML code
6. Open the liveBooks dashboard
7. Click Content
8. Click on the page you wish to add your ‘Review Us’ widget to
9. Click the green “+” icon to add a content block to the page

10. Highlight and click the HTML content block

11. Paste the HTML code you copied from your WeddingWire account into the HTML box. For more information on how to use this content block, click here!

12. Save and publish!
Is there a new liveBooks8 feature that you are excited to learn more about? Let us know at social@livebooks.com!
The liveBooks8 website editor allows you to create a custom navigation bar that fits your website’s specific needs. Whether this includes a drop-down menu that organizes your portfolio galleries, the use of social media icons, or the use of links and buttons, you’ll be able to customize every aspect of the navigation bar. Check out the video tutorial below to get started!
Is there a new liveBooks8 feature that you are excited to learn more about? Let us know at social@livebooks.com!
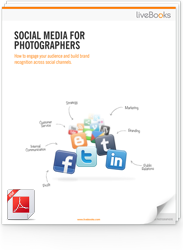
FREE EBOOK
Learn how to engage your audience and
build brand recognition across social
channels. Learn more...
READY TO GET STARTED?
Pick your package. Pick your design.
No credit card required.