
Resolve
A collaborative online community that brings together photographers and creative professionals of every kind to find ways to keep photography relevant, respected, and profitable.
Have an idea for a post?
Want us to find an answer to your question? Interested in becoming a contributor?Email us
CATEGORIES
- Aerial Photography
- Business
- Featured Blogger
- Featured Website
- Fine Art Photography
- Ideas
- Industry Events
- Inspirational Work
- Meet the Team
- Networking
- New Features to LB8
- On The Calendar
- Philanthropy
- Photography
- Adventure Photography
- Advertising Photography
- Animal Photography
- Art Photography
- Beauty Photography
- Celebrity Photography
- Commercial Photography
- Documentary Photography
- Editorial Photography
- Fashion Photography
- Food Photography
- Hospitality Photography
- Interior and Architecture Photography
- Landscape Photography
- Lifestyle Photography
- Nature Photography
- Photojournalism
- Portrait Photography
- Science Photography
- Space Photography
- Sports Photography
- Still Life Photography
- Travel Photography
- Wedding Photography
- Wildlife Photography
- Wine Photography
- Playlist
- Playlists
- Social Media
- Tuesday's Tip
- Video
- Webinar
- Website Tips
Posts Tagged: web design


Photo: Produced by Spring Studios for White House Black Market
Liz Teich has been a wardrobe stylist for about a decade and with about 17 years in the industry from working at the clothing line Chaiken, as well as an art director for advertising clients such as Maybelline. She has a BFA from Syracuse University in Advertising Design, where she had to not only concept but also execute the ads for her portfolio. She also studied fashion design at RISD for a summer, in addition to taking both fashion and advertising classes in high school. It was a natural transition to take her knowledge of how both the fashion and advertising industries operate and apply it to styling for her clients. More »

CORE Landscape is a boutique landscape architecture and implementation design firm located in Atlanta, GA. They take pride in creating well-thought-out design solutions for exterior spaces ranging from small gardens to large commercial sites. They started in 2004 as a design only firm and evolved over the years to include full design-build services. Their design style tends to trend towards simple materials choices and bold landscape design. More »

Jim Vasquez been a photographer for over 30 years. He was a commercial photographer for 10 of those 30 years, but left due to some disillusionment and burnout. He was a master B&W printer, and continues to have a great passion for B&W. He quit printing years ago due to lower back issues from standing in front of an enlarger for hours on end, so needed to look elsewhere. The new digital age has reawakened his love for doing music photography, especially portraits! To see more of his work, visit his liveBooks website: http://jimvasquezphotography.com
Q: How would you describe the aesthetic of your website in three words?
JV: Simple, Visual, Graphic.

Q: How often do you typically update your website?
JV: Constantly. I like to find out what is working for me visually. I am always taking new images so I want to keep updating on a constant basis to keep interest in my work.

Q: How do you choose the photos that you display on your homepage?
JV: I went with a single photo that really says what I am all about. There are different views about a single image vs a collage. A single image should make a statement about your work and encourage the visitor to look further, “come on in”. A collage can be overload and appear busy. I struggle with this idea of keeping things simple and talk to art directors for their opinion. We live in an instant gratification age.

Q: What is your favorite new feature of liveBooks8?
JV: There are so many that it is hard to pick one. I like being able to individualize my site with customization on fonts, backgrounds, and colors.

Q: What’s one piece of advice you’d offer to someone designing their website?
JV: Show the work that defines you. In my early days I tried to cover all the bases and it just didn’t work. I am now doing what I love and I hope people see that in my work.


The liveBooks website editor allows you the freedom to create a custom navigation bar that fits your website’s specific needs. Whether this includes a drop-down menu that organizes your portfolio galleries into a visual index for your viewers to choose from, the use of social media icons, or the use of links and buttons to direct your viewers to another webpage or websites, you’ll be able to customize every aspect of the navigation bar.
Here are some helpful tips to get you on your way to creating a navigation bar that fits the design of your website:
Creating Drop-Down Menus
- Log in to your liveBooks website editor
- Select the Content tab
- Select “Add New Pages”

4. Check the box next to “Navigation Item” and then select “Add”

5. From the drop-down, select “Text (No link).” This will allow you to create a title for the portfolio/gallery without leading your viewers to a blank page. Once you have chosen this option, change the Text Label to the name you would like your drop-down menu to have.
6. Once you have successfully finished all of the above steps, you can begin adding portfolios that will showcase your work. In order to organize the portfolios to display in the drop-down menu you have just created, you will need to indent your portfolio pages.

Social Media Icons in the Navigation Bar
The new liveBooks8 website editor allows users to easily and seamlessly integrate social media outlets to their website. What’s the difference between having your social media icons in the navigation versus in the footer? Here are some of the most contrasting differences:
- Depending on the layout that you have chosen, social media icons may catch viewer’s eyes more in the header of your website
- Having your social icons in the navigation bar highlights the importance of social media outlets with your work; they are equally as important as other pages on your website
- The navigation bar allows up to 4 social media icons at a time; the footer allows for unlimited social media icons to be added
- If you have added a variety of pages to your navigation bar, we recommend that you consider adding social media links to the footer of your site. With a number of pages in your navigation, viewers may find it to be too crowded.
Adding social media icons to navigation bar:
- Log in to your liveBooks website editor
- Select “Content”
- Select “Add New Pages”
- Check the box next to “Navigation Item” and then select “Add”
- From the drop-down, select “Social Icons”

6. Select up to 4 social media icons that you would like to display on the navigation bar (Tip: Make sure to keep the “Open in new window” box checked. Otherwise, your viewers will leave your page immediately upon clicking the icon.)
7. Make sure to copy and paste the exact URL from your social media outlet. Also – check these icons frequently to make sure they are still linking to your social feeds correctly. Changes in usernames and domains from social media feeds may cause you to lose viewers along the way.
Creating Links and Buttons
The links and buttons feature on the navigation tool can help navigate your viewers to a specific part of your page that you want to showcase. This is especially true in the case of buttons. Links, on the other hand, are more commonly used for external links, which will lead viewers to another website.
Adding links and buttons to the navigation bar:
- Log in to your liveBooks website editor
- Select “Content”
- Select “Add New Pages”
- Check the box next to “Navigation Item” then select “Add” (look above for image)
- From the drop-down, select either “Link” or “Button”
- Change the “Text Label” to what you’d like your Link of Button to read to viewers (i.e.: “My Blog” if the link leads viewers to your blog)
- Copy and paste the URL into the “Link” section

Is there a liveBooks feature that you want to learn more about? Let us know at social@livebooks.com!
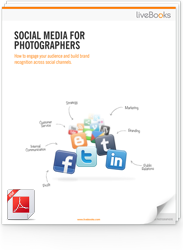
FREE EBOOK
Learn how to engage your audience and
build brand recognition across social
channels. Learn more...
READY TO GET STARTED?
Pick your package. Pick your design.
No credit card required.