
Resolve
A collaborative online community that brings together photographers and creative professionals of every kind to find ways to keep photography relevant, respected, and profitable.
Have an idea for a post?
Want us to find an answer to your question? Interested in becoming a contributor?Email us
CATEGORIES
- Aerial Photography
- Business
- Featured Blogger
- Featured Website
- Fine Art Photography
- Ideas
- Industry Events
- Inspirational Work
- Meet the Team
- Networking
- New Features to LB8
- On The Calendar
- Philanthropy
- Photography
- Adventure Photography
- Advertising Photography
- Animal Photography
- Art Photography
- Beauty Photography
- Celebrity Photography
- Commercial Photography
- Documentary Photography
- Editorial Photography
- Fashion Photography
- Food Photography
- Hospitality Photography
- Interior and Architecture Photography
- Landscape Photography
- Lifestyle Photography
- Nature Photography
- Photojournalism
- Portrait Photography
- Science Photography
- Space Photography
- Sports Photography
- Still Life Photography
- Travel Photography
- Wedding Photography
- Wildlife Photography
- Wine Photography
- Playlist
- Playlists
- Social Media
- Tuesday's Tip
- Video
- Webinar
- Website Tips
Social Media

With incredible visual appeal and ability to connect with large audiences, it is no surprise that Instagram has become a huge social media platform for photographers and creatives. While there is so much potential to reach your target audience, it does take a bit of planning and research on your end to make the most of your Instagram account. Believe it or not, by using a little bit of strategy, you will be able to take your profile from an account to share your day-to-day activities to a powerful business networking tool. Today, we are sharing our top tips for making the most of your Instagram profile:

Image Source: Pexels
- Post often, but quality over quantity:
- It is important to provide your audience with regular content. Once you develop a regular posting schedule, stick to it. Chances are, your audience will get used to seeing your account in their feed and will start to look forward to interacting with your content. With that being said, each post should positively contribute to your personal branding goals. Sometimes it is easy to post just to post, but ensure that each photo’s mood, content and quality will sequence seamlessly with the image next to it in your profile, while allowing your audience to get to know you and your business a little better.
- Find your style and stick to it:
- Some people love landscapes, and some people love portrait photography. Some people are interested in a behind the scenes look at your daily life, and other’s want to see your perfect final images. It is up to you to decide who you want to reach, where you want to be in the future, and then go all in. It is great to vary the content in your feed, but consistency is key when it comes to voice and styling, The most important piece of the puzzle, however, is to make sure that you are staying true to your own personal voice and style. Your clients are coming to your social media to learn more about YOU and YOUR work. In the end, people that are interested in the content you are producing will follow and interact with your profile. Find your personal style and use this to guide your content and online image while connecting with your ideal audience.
- Use hashtags, but make them specific:
- Hashtags are a great way to connect you with professionals in your industry as well as potential clients. Beware though, hashtags are also a great way to connect you with spammers. Keep hashtags specific to your location, the content of the image, and your industry to drive up interaction with your target audience. While it feels great to have a large number of followers, you want to make sure that the right people are following you. I will let you determine who the right followers are for your account, but it is our hope that you are able to connect with people that are genuinely interested interested in the content that you are producing (and could, hopefully, turn into potential clients!).
- Genuinely network with other professionals in your industry:
- How good does it feel when you receive a compliment or comment on an image? Pretty good, right? Stay connected with professionals in your industry by commenting and interacting with their Instagram profiles too. Most importantly, make sure your comments and interactions are genuine, thoughtful, and productive. Instead of posting a generic: “Great image!” comment, let the poster know exactly what it is you love about their post or profile. Taking an extra second to generate genuine feedback has the potential to translate into deeper connections and a larger following base overtime. Keep in mind, however, that each user’s Instagram post is essentially a public platform, despite any security settings that are in play. Make sure you are conveying your personal brand image at all times. You never know who may be following them!
- Make sure your client (and potential clients) know how to find you online:
- Know that once you have gained followers, they may want to interact with you in every way! That means that when they visit your website, they will want to check out your social media outlets as well. With the new liveBooks 8 platform, you are able to create a bridge between your website and your social media accounts. Inserting custom social media icons into your website’s footer or navigation is a great start. Read this blog post to learn how to integrate social media icons into your website’s footer. Also don’t forget: you can also add your website link to your Instagram profile. This will help lead your Instagram followers into potential clients!
Are you on Instagram? We want to feature you! If you have an image that you are interested in having us share, send us an email at social@livebooks.com.

The liveBooks website editor allows you the freedom to create a custom navigation bar that fits your website’s specific needs. Whether this includes a drop-down menu that organizes your portfolio galleries into a visual index for your viewers to choose from, the use of social media icons, or the use of links and buttons to direct your viewers to another webpage or websites, you’ll be able to customize every aspect of the navigation bar.
Here are some helpful tips to get you on your way to creating a navigation bar that fits the design of your website:
Creating Drop-Down Menus
- Log in to your liveBooks website editor
- Select the Content tab
- Select “Add New Pages”

4. Check the box next to “Navigation Item” and then select “Add”

5. From the drop-down, select “Text (No link).” This will allow you to create a title for the portfolio/gallery without leading your viewers to a blank page. Once you have chosen this option, change the Text Label to the name you would like your drop-down menu to have.
6. Once you have successfully finished all of the above steps, you can begin adding portfolios that will showcase your work. In order to organize the portfolios to display in the drop-down menu you have just created, you will need to indent your portfolio pages.

Social Media Icons in the Navigation Bar
The new liveBooks8 website editor allows users to easily and seamlessly integrate social media outlets to their website. What’s the difference between having your social media icons in the navigation versus in the footer? Here are some of the most contrasting differences:
- Depending on the layout that you have chosen, social media icons may catch viewer’s eyes more in the header of your website
- Having your social icons in the navigation bar highlights the importance of social media outlets with your work; they are equally as important as other pages on your website
- The navigation bar allows up to 4 social media icons at a time; the footer allows for unlimited social media icons to be added
- If you have added a variety of pages to your navigation bar, we recommend that you consider adding social media links to the footer of your site. With a number of pages in your navigation, viewers may find it to be too crowded.
Adding social media icons to navigation bar:
- Log in to your liveBooks website editor
- Select “Content”
- Select “Add New Pages”
- Check the box next to “Navigation Item” and then select “Add”
- From the drop-down, select “Social Icons”

6. Select up to 4 social media icons that you would like to display on the navigation bar (Tip: Make sure to keep the “Open in new window” box checked. Otherwise, your viewers will leave your page immediately upon clicking the icon.)
7. Make sure to copy and paste the exact URL from your social media outlet. Also – check these icons frequently to make sure they are still linking to your social feeds correctly. Changes in usernames and domains from social media feeds may cause you to lose viewers along the way.
Creating Links and Buttons
The links and buttons feature on the navigation tool can help navigate your viewers to a specific part of your page that you want to showcase. This is especially true in the case of buttons. Links, on the other hand, are more commonly used for external links, which will lead viewers to another website.
Adding links and buttons to the navigation bar:
- Log in to your liveBooks website editor
- Select “Content”
- Select “Add New Pages”
- Check the box next to “Navigation Item” then select “Add” (look above for image)
- From the drop-down, select either “Link” or “Button”
- Change the “Text Label” to what you’d like your Link of Button to read to viewers (i.e.: “My Blog” if the link leads viewers to your blog)
- Copy and paste the URL into the “Link” section

Is there a liveBooks feature that you want to learn more about? Let us know at social@livebooks.com!

In today’s digital landscape, a social media presence is absolutely vital for the success of your business. At liveBooks, we understand this. With over 100 social icons to choose from, liveBooks8 allows for complete customization of the social experience you provide your audience. Connect with clients easily, using liveBooks’ social media integration tools.
Today’s tip details how to create your ideal social experience for your audience through the customization of a social media footer.
To add social media icons to the footer of your liveBooks8 site:
1. Log into the liveBooks 8 editor.
2. Select the Content editing tab.
3. Select footer on the right side, under Global Content.

4. Select your desired social platforms from our bank of over 100 options. With selections including anything from Facebook to Spotify and Vimeo, you will be able to create a customized and dynamic social experience for your unique audience.

5. Add your unique social media links in the related fields.
Pro-tip: test the functionality of each button under the Design tab in your site’s preview mode to ensure each link is working as desired.
6. Admire your new social media footer and connect with your audience on a new level.
To change the color of your icons to match your branding:
1. From Content, navigate to the Design tab.
2. Select the area of the site where your social icons are located. For this tutorial, our social icons are located in our footer, so we will select the footer tab.
![]()
3. Use the tools provided to customize the look, color, size and functionality of your new social icons.

4. Press save. Customization is as easy as that!
Get social with liveBooks! Connect with us on Facebook, Twitter & Instagram.
Interested in learning more about a specific liveBooks8 feature? We want to know! Send us an email at social@livebooks.com.

The only thing we love more than our liveBooks8 platform is the gorgeous work that our clients are sharing on it! Have an image that you are dying for the world to see? We want to feature you! We are excited to announce our first ever summer Facebook cover photo contest where we are looking to feature the #bestofLB8 on our page each week.
To submit your images, please send the original image file to social@livebooks.com with the subject line “Facebook cover photo contest” or submit your entry via Twitter or Instagram by tagging liveBooks AND #bestofLB8. We will select u to eight photos to be displayed weekly between July 1 & August 22, 2016.
Submissions are now open! Follow the rules below to have the chance to be featured on our Facebook page.
To submit:
Please send the original image file to social@livebooks.com with the subject line “Facebook cover photo contest” OR submit your entry via Twitter or Instagram by using the hashtag #bestofLB8 AND tagging liveBooks. Please include your full name, where the photo was taken and the date in your entry. The summer cover photo of the week will be selected by the liveBooks team. Up to eight photos will be posted between July 1-August 22, 2016. Selected photos will be featured on our Facebook page as a cover photo for approximately one week and may be shared on Instagram
Rules & Regs:
1. Photo must have been taken by you in the last 3 years.
2. Photos must be horizontal and fit within the Facebook cover crop area of 851px by 315px. Vertical photo submissions will 3. be discarded.
4. Please avoid heavy filters and edits.
5. Explicit content will be discarded.
6. Smartphone photos are accepted but DSLR images are preferred.
7. By submitting your photo through email or hashtag, you give liveBooks permission to use and promote the submitted image via our liveBooks social media outlets.
Think you have what it takes? Submit your photo now!
Weekly Winners:
July 1, 2016:
C.J. Dewolf

July 11, 2016:
Joan Ford

July 18, 2016
Jason Halayko

July 25, 2016
Brian Ach

August 1, 2016
Scott Blatt

August 8, 2016
Stephen Guenther

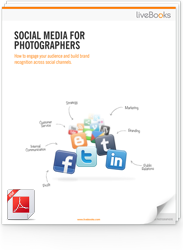
FREE EBOOK
Learn how to engage your audience and
build brand recognition across social
channels. Learn more...
READY TO GET STARTED?
Pick your package. Pick your design.
No credit card required.