
Resolve
A collaborative online community that brings together photographers and creative professionals of every kind to find ways to keep photography relevant, respected, and profitable.
Have an idea for a post?
Want us to find an answer to your question? Interested in becoming a contributor?Email us
CATEGORIES
- Aerial Photography
- Business
- Featured Blogger
- Featured Website
- Fine Art Photography
- Ideas
- Industry Events
- Inspirational Work
- Meet the Team
- Networking
- New Features to LB8
- On The Calendar
- Philanthropy
- Photography
- Adventure Photography
- Advertising Photography
- Animal Photography
- Art Photography
- Beauty Photography
- Celebrity Photography
- Commercial Photography
- Documentary Photography
- Editorial Photography
- Fashion Photography
- Food Photography
- Hospitality Photography
- Interior and Architecture Photography
- Landscape Photography
- Lifestyle Photography
- Nature Photography
- Photojournalism
- Portrait Photography
- Science Photography
- Space Photography
- Sports Photography
- Still Life Photography
- Travel Photography
- Wedding Photography
- Wildlife Photography
- Wine Photography
- Playlist
- Playlists
- Social Media
- Tuesday's Tip
- Video
- Webinar
- Website Tips
Designing the perfect website to show off your work and style can be overwhelming, daunting, and extremely time consuming. Here at liveBooks we strive to make it as easy (and fun!) as possible to create your website. While there are many things you can do within your editSuite, in this blog post we have narrowed down the top five things to do to get your website ready to go-live in one hour.
Portfolios and Libraries
As photographers and creative professionals, one of the most important aspects of your website will be showing off your beautiful work. The first thing you will want to do within your editSuite is name your portfolios and libraries so you know where to put your content once it is uploaded. One thing to note: libraries are for organizing and storing your images within your editSuite and do not appear on the user-facing side of your website. There is no limit to the number of libraries you can have on your site, and you can always add more than the default amount given. Portfolios, once you have added at least one image to them, will show on your website.
Check out these Support articles to learn more:
What Is The Difference Between Libraries and Portfolios?
How Do I Use The Name Portfolios and Libraries Module?
Upload Content
Once you have your portfolios and libraries named, you will want to upload your photos. Your first step will be to prepare your images according to the Image Prep Instructions. Once you have uploaded the images to your site, they will appear in the acquire area of your “Upload Image” page and you will see thumbnails as the images appear. Note that these images will remain in the acquire area until they are moved into a library for permanent storage (which is why naming your libraries ahead of time is a good idea.) Once images are moved to a library, you will then have the ability to place them into a portfolio for viewing on the front end of your site.
Some additional helpful articles:
How Do I Use The Upload Images Module?
How Do I Use The Upload Images Module For Scaler?
Name Your Pages
After your photos are uploaded, you will want to make sure that the rest of the pages on your website are correctly named and filled with some content. Typical names include: Home, About, Contact, Video, Blog, etc. Once you have renamed your pages accordingly, add some basic content and links so that they are not blank when you go-live.
Additional Resources:
How Do I Rename One Of My Pages?
How Do I Use The Pages Module?
Choose Homepage Photo(s)
One of the final steps to get your website go-live ready will be choosing your homepage photo (or photos, depending on the type of template you choose.) These will be displayed when a user first lands on your page and is really the first impression that people will have of your work and style.
How Do I Change The Images In My Homepage Slideshow?
How Do I Create And Control My Homepage Gallery?
Go-Live!
Once the above steps are done, you have previewed your website, added some brief content, and activated your account, you will want to submit a Go-Live request so that your beautiful website can be seen by the world!
Have any other to-do’s before going live with your website? Sound off in the comments or shoot us an email at social@livebooks.com!
Leave a reply
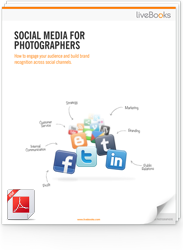
FREE EBOOK
Learn how to engage your audience and
build brand recognition across social
channels. Learn more...
READY TO GET STARTED?
Pick your package. Pick your design.
No credit card required.